山姆的編程實作分享。。。

Sam Blog, Sam Sharing, Sam Studio

2021年1月11日

[Python] 初嘗 Streamlit


Streamlit 是什麼 ?

就如 Streamlit 官網的描述 (上圖) : 透過 Streamlit Python Package 可以快速的將你的 Data Script 以 Web Apps 的形式分享出去。

Streamlit 官網

Streamlit 有一個很大的優點,就是 " No front-end experience required”,也就是說,不需要有 Web Apps 的 background,由 Streamlit 幫你搞定 Web App 的架設,而你只要專心在資料的呈現就可以了。

事實真的如此?親身體驗的結果如下 :

就這樣 3 行原始碼

然後在 Terminal 執行 

Streamlit run yourScript.py 

Web App 就在 Browser 生成了

心得

  • 透過網站的 " Get started”,Step by Step 的引導, 2 分鐘真的就可以建立一個 Web App,真的很酷。

  • 一開始是在 Windows 10 安裝 Streamlit Package,就遇到 install error,嘗試網路上給的解法也是無法順利安裝起來;接著轉戰 Ubuntu 18.04,雖有遇到 Windows 10 有的 errors ,但套用網路上給的解法就成功的安裝了。

  • 分享你的 Web Apps 必須是註冊會員 ( 註冊免費 )。

  • 想要有像樣的 Web App 還是必須熟悉一下他的 API


2021年1月9日

[Python] Change Python3 as the default version on Ubuntu


Python default version on Ubuntu 18.04 LTS

The default version of Python on Ubuntu 18.04 is Python 2, that is, if you run“python”command in the Terminal,  the Python 2 engine will be executed. Even if you have installed Python 3.5 or higher version.

A solution to change Python3 as the default version

    sudo update-alternatives --install /usr/bin/python python /usr/bin python3 1


2021年1月4日

2021年1月1日

[Arduino 教學] Hello STM32duino


在這篇 [STM32] Why STM32 ? 筆記裡,我列出了我購買 STM32 的原因,以及STM32 開發環境的選項,其中一項軟體開發環境就是 STM32duino,所以這篇就來說明如何將 STM32 Arduino package 加入 Arduino IDE,然後透過 "Blinking LED”範例的操作,各位就可以和這篇 [STM32] Hello STM32Cube with Blinking LED 做一個 CubeIDE 和 Arduino IDE 的比較。


Install STM32 BSP into Arduino IDE

簡潔的說,就是和 ESP8266 / ESP32 的操作步驟是一樣;就是將下面的 URL 加到  Arduino IDE 的 “Additional Boards Manager URLs”內,然後安裝 STM32CubeProgrammer,因為 Arduino IDE 會呼叫它做 firmware 的 upload 。

https://github.com/stm32duino/BoardManagerFiles/raw/master/STM32/package_stm_index.json


Step 1: 開啟 Arduino IDE,接著點選 “File -> Preference”,然後如下圖,將上面 URL 加入“Additional Boards Manager URLs”的 diallog 內。


Step 2: 在上一步驟按下 "OK" 後,接著點選 “Tools -> Board ->Boards Manager...”。


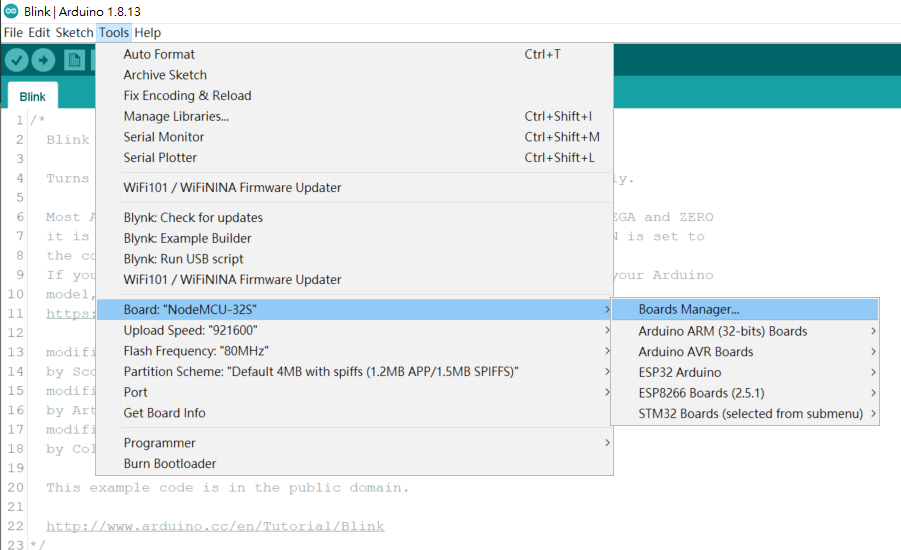
接著在 Boards Manager 視窗輸入 "STM32”,然後將 “ STM32 Cores”下載安裝起來。


待 STM32 BSP (Board Supported Package) 安裝完成後,再次點選 “Tools -> Board ->Boards Manager...”,就可以看到如下圖,"STM32 Boards" 的選項出現在 Arduino IDE 的 Boards Manager 的清單內了。


Step 3: 到 ST 官網下載 " STM32CubeProgrammer" 然後安裝它。

因為 Arduino IDE 需要透過 STM32CubeProgrammer 來做 firmware 的 upload 。


==================================================

Blinking LED with Nucleo-F767ZI Board

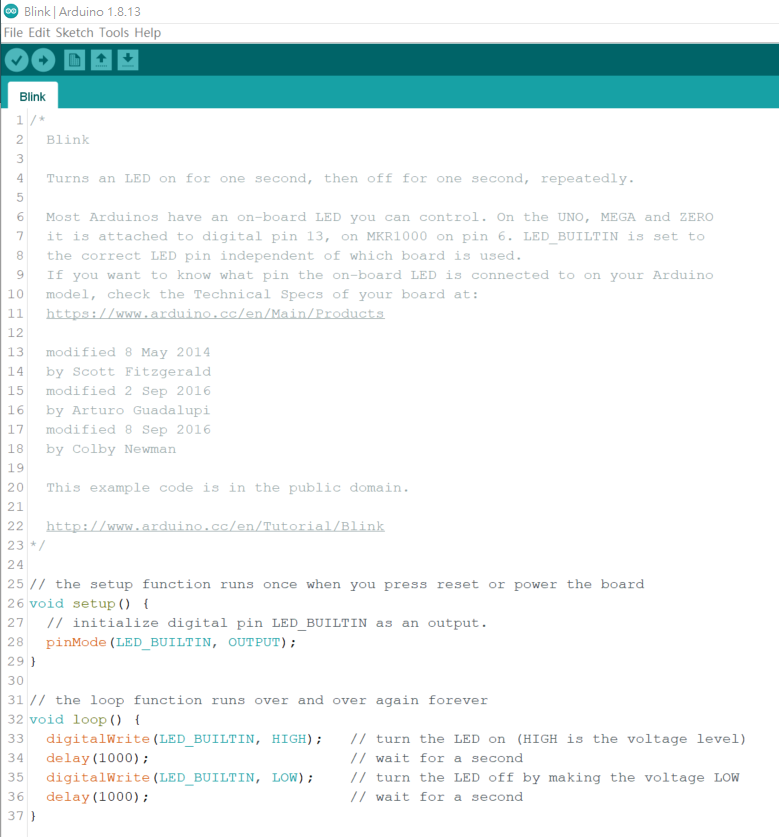
Step 1: 開啟 Arduino IDE,接著點選 “File -> Examples -> 01.Basic -> Blink”。


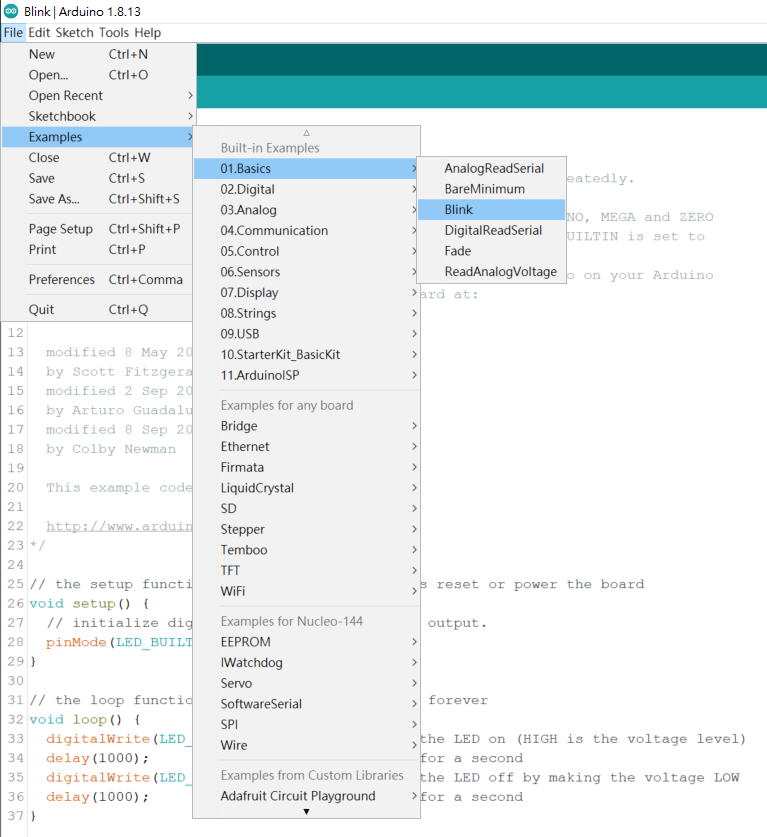
Arduino IDE 就會載入"Blink”的範例程式碼,如下圖 。


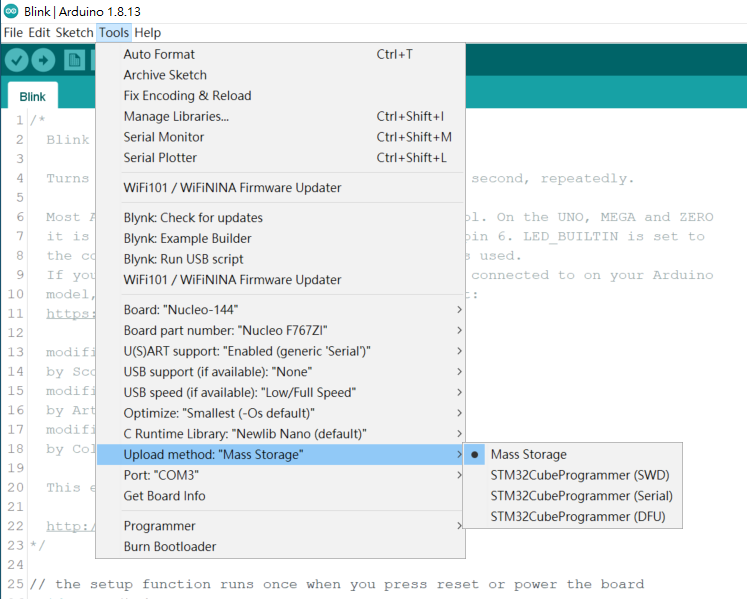
Step 2: 接著點選 “Sketch -> Upload”,Arduino 就會依照你的設定 Upload new firmware。


到這裡,你不妨比較一下 STM32CubeIDE 和 Arduino IDE 的差異。

但有一點,我要告訴大家的是,ST 官方提供的 STM32CubeIDE 能透過 ST-Link 做到 real-time debugging 功能 (SWD, JTAG),這點是 Arduino IDE 無法做到的,若你是 Advance User 或是做比較複雜的專案,real-time debugging (SWD, JTAG) 這功能你是需要的,千萬不能放掉 STM32CubeIDE 這個開發環境的。


以上參考資料來自

https://www.stm32duino.com/

https://github.com/stm32duino

https://www.arduinolibraries.info/authors/stm32duino


熱門文章